

Life as a MagMod Wedding Photographer | My New Lighting Kit 2 Years Later | Raleigh Wedding Photographer
Update – You can find a list of all of my equipment here
 Two years ago, almost to the day, I finally shared my experiences with switching over to MagMod as a wedding photographer. I had called them gimmicky before that, but after trying them and eating those words, I had decided to make the switch and I shared about it here: How Magmod Changed the Game for Me | My New Lighting Kit. Well, two years later, my kit looks a little different than it did originally writing that article, but the one thing I’ve got more of now than before is MagMod gear.
If you’re just here looking for a MagMod coupon code, use TACO for $10 off and I’ll save you scrolling to the bottom for it.
If you’re looking for the new MagMod product scroll through all my other information first because I hate your attention span.
Or just click here for the Kickstarter. Or scroll down 14 times. Wait. no. 15 times. No? Try 13.
My Lighting Kit
Light wise I’m using:
And modifier wise, my kit currently includes:
4x- MagGrids
1x- MagBeam
1x- MagSphere
1x- MagSnoot
2x- MagGel Holders
1 of every type of MagGel that MagMod will sell me
1 Phottix Luna Soft-box (For now… More on this below)
Flash wise it’s pretty straightforward, my speedlights are there to be portable, and when I need a huge amount of power, the AD200 does what I need it to. Modifier wise, I’ve swapped out a lot of other gear in my bag, and this is all I’m using for weddings, both in and out of state. I mentioned this in the original post, but portability and speed are essential to me. Every piece of equipment in my bag MUST serve a purpose and it must be easy for me to use in front of my clients. I never want my flash work to be a distraction or take time away from their day, and this is where MagMod shines.
The MagGrid
The MagGrid is what originally made off camera flash ‘click’ for me. The idea that I can take a flash, put it somewhere and have light ONLY where I want it, and not spilling everywhere was huge. If you look at my work, a large majority of it will have been taken with a grid on it, and often for different reasons.
Sometimes I use it just to isolate my light on a subject for a dramatic look.

1/640 F/1.4 ISO 640
Other times I use it to keep a scene ‘intact’ and make sure that light only touches my subject.

13 F/2.0 ISO 1600
Other times I just use the Grid to ensure flash won’t spill into my lens accidentally, washing out my work.

1/60 F/1.8 ISO 800
Regardless of what I’m shooting, the grid is usually my ‘starting point’ for off camera work.
The MagSphere
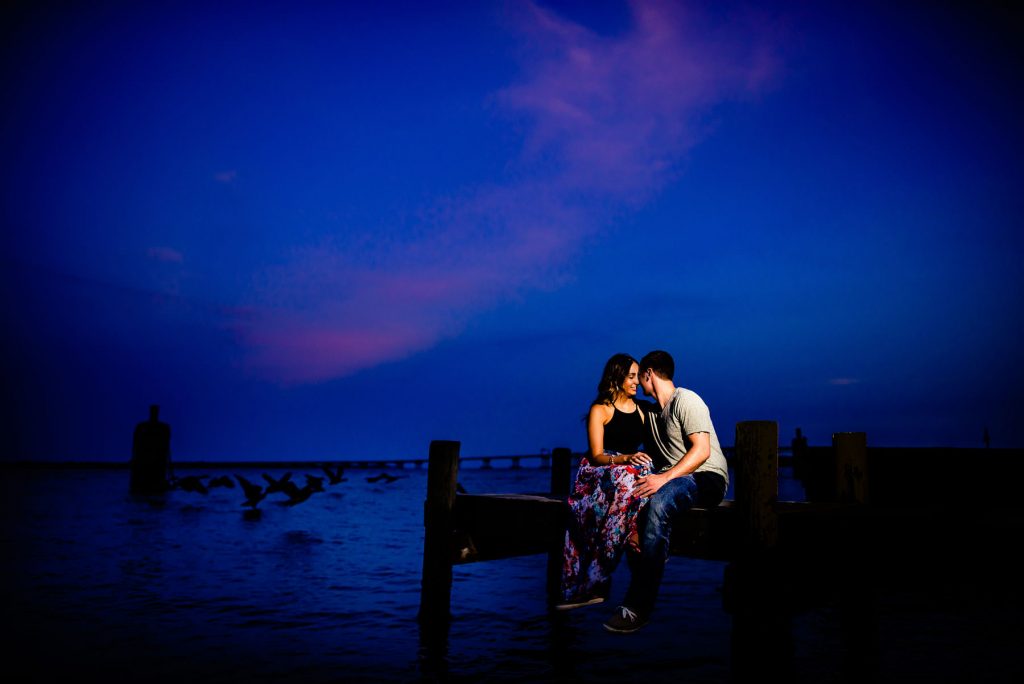
I need to clarify something before we go. The purpose of this tool is not to soften the light, it is to spread it. The ONLY way light can be softened is by making the light source bigger, or bringing it closer to the subject, so if you are using this in lieu of a softbox, you have to get this sphere very close to your subject. Wouldn’t it be great if MagMod made a modifier just for soft light? ….Hmm… More on that below… That said, I use the sphere to safely light couples and subjects where the grid may be a bit too narrow, as well as to add in a gel where I’d like to spread some color in a background or to do create something a little different.
Here I used the sphere from up high (on a monopod) to avoid any unflattering shadows in an image.

1/4000 F/1.6 ISO 160
Here I used it paired with a 1/2 blue MagGel (I’ll come back to this in a minute) to change the appearance of my Background.

1/500 F/2.0 ISO 400
And here I used it to create fire in a fireplace that I wasn’t going to turn on in the middle of a North Carolina summer.

MagGels
In days of old, using a gel required taking a sheet of plastic, cutting it out ahead of time, putting it on my flash, taping it to my flash, and hoping that that tape and color then proceeded to work for the next 19 weddings in a row because I wasn’t about to change it mid shoot. Now, I can put them in any one of my MagMods and not slow down a second. The new ones (which I just went ahead and bought all of) are even labeled which is great, because I think if you can tell the difference between 1/4 and a 1/2 CTO by sight you should be burned at the stake for witchcraft.
I mentioned before changing the background using a 1/2 blue gel. By using the 1/2 blue gel to ‘cool off’ the couple (ie- turn them blue) I can then warm up my white balance for the entire image and create a pleasantly warm background, which I did here as well.

1/4000 F/1.4 ISO 100
You can also use MagGels to go the other route, and take a rainy day and make it look like the sunset (like I did here) by putting a 1/2 (or full) CTO gel behind the couple. Both of these images were taken on cloudy or rainy days with no Sun.

1/1250 F/3.2 ISO 800

1/2000 F/1.4 ISO 640
Of course, if you just want to Jazz up the scene a bit, you can just add a MagGel for a pop of color at any point too.

1/640 F/1.8 ISO 400

1/250 F/2.5 ISO 1000
MagSnoot
I may not use the MagSnoot all that much, but I’m always happy to have it in my bag when I need it. It’s a scalpel for light and super handy when I’m trying to light one very specific thing. Like just catching the couple in this scene.
1/1250 F/2.0 ISO 320

MagBeam
Intentionally saved for last, my Magbeam is the swiss army knife of my wedding kit. One tool allows me to increase how bright my flash can appear in frame, create incredible portraits in the most inconspicuous locations, and light subjects up from a distance, so I don’t have to clone out a light stand.
Power
First, let’s talk brightness. Simply put, this thing combined with my AD200 is kind of like walking around with a portable sun. These three images were taken side in the exact same spot without the couple ever moving. The first was taken with the MagBeam and a very high shutter speed (1/8000)

1/8000 F/4 ISO 100
The second one was still taken with the beam, but a lower shutter.

1/800 F/4 ISO 100
And the third, taken with natural light alone.

1/2000 F/1.4 ISO 200
Distance
The other place that power comes into play is the ability to not have to clone out a lightstand, as I can put my flash further away. In the two examples below I was able to create a wonderful scene, without having to worry about what would need to be cloned out later.

1/4000 F/2.8 ISO 640

1/320 F/2.2 ISO 3200
This image was created with one MagMod gridded speedlight behind the couple with an orange gel and a flash in front, camera left with a MagBeam
The Magic Maker
This is where this thing gets amazing. Below, you’ll see the final image, and then the scene with what it looked like without a flash. Pretty stark differences between the two. Using the MagBeam in combination with the MagMasks and MagGels, you can create extraordinary scenes in the most unassuming locations. This to me is what being a wedding photographer truly is. The ability to make magic in less than magical circumstances.


1/1000 F/2.0 ISO 320

The “Soft Light” Dilemma

You may have noticed that above I mentioned using a Phottix Luna softbox, yet I didn’t show it in the post. The reason for that is because today, MagMod is officially announcing their kickstarter for their brand new set of products and I am beyond excited for this. The convenience that MagMod brings to my lighting kit, now with the quality of a bigger modifier means that I will be replacing my current softbox and all of my flash holders with the MagBox, MagRing and MagShoe. I’ve seen these things in action for a while now and I can’t wait to be able to share with you some of what I’ll be doing with them. A full post will come when I have it in my hands, but this thing is a game changer and I can’t overstate how incredible EACH of these things are to the industry. Speed and quality lighting have always been enemies of each other. Now, the best of both worlds is in your hands.
To back the kickstarter, head here!
Also pay attention to the diffusion panel… not only is there a traditional fabric diffuser, they also have added in the FocusDiffuser… think lens + grid for your softbox. Meaning MORE light coming out of your softbox, because the folks over at MagMod don’t believe in physics apparently. Yes. Yes that noise you hear is me crying tears of joy.
DO YOU SEE HOW EASY THIS IS? One flash for me, one flash for my second photographer, ALL in one package and with magnetic ease of use. This is better than my first Fortnite win. Better than a wedding without a single photo suggestion from a bridesmaid. Maybe even better than tacos.
I said maybe. Don’t get crazy. Maybe better than a crunchwrap. Let’s start there.
So again, just to summarize why this is so awesome:
Awesome flash bracket/cold shoe all in one replacement
Magnetic, super fast, able to be gelled softbox
Ring that can hold two flashes (or AD-200’s aka one for me AND one for my assistant, all in the same box)
FocusDiffuser for a boost of light AND directional control in my softbox
A sweet case to carry it all + two speedlights
The incredible MagMod customer support team on standby in the rare event you do have any issues.
The Wrap
To say MagMod has influenced my work would be an understatement. It not only changed the way I understand flash, but it helped me understand light. I can’t recommend their stuff enough, and if you found this article helpful, please feel free to share it as you would like, just remember that all images here are copyrighted. You can also hear more about my love with MagMod on my ‘How I Shot It’ interview with them.
About the images
These MagMod Wedding images were taken with combinations of a a Nikon D4s, Nikon D750, Nikkor 85mm 1.4G, Nikkor 45mm Tilt Shift, Nikkor 24mm 1.4G, 5 off camera Flashpoint R2 Speedlights, and 2 AD-200 strobes with an assortment of MagMod modifiers. You can use coupon code ‘SHAY’ for $5 off any MagMod purchase from their site. All of my images are color corrected with Adobe Lightroom only and not altered or photoshopped in any way.
I’d also like to extend a huge thank you to the folks at MagMod for their incredible products. All of the links in this post are affiliate links.